
Add Hazard
When a characteristic, area or facility that could cause danger or risk is identified on the property this should be added as a hazard and updated on the property map. Hazards can only be added from within an individual property, learn how to navigate to a property here.
1. Select the Hazards Workflow
2. Click ‘Add hazard’
Choosing the right type of feature
After clicking ‘Add hazard’ you will be presented with a list of available feature types. These are split into three different geometry types.
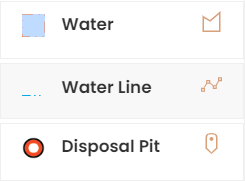
You should select the correct type and geometry for the hazard.
Use point when there’s just a single location for the hazard such as a disposal pit or chemical shed

Use line for hazards such as drains or overhead powerlines

Use area for hazards such as no go areas or gullies

You can filter the list of available feature types by typing in the search box or by clicking the filter button
Add a Point hazard
Click the feature type in the menu to highlight it
Click on the map to add the hazard at that location
Use Reset sketch if you need to change the location
Select Add details
Enter the hazard details
Click Save hazard or Back to cancel
Add a Line hazard
Click the feature type in the menu to highlight it
Draw the line on the map by clicking on the start location and then double clicking to end the line
Use Reset sketch if you need to redraw the line
Select Add details
Enter the hazard details
Click Save hazard or Back to cancel
Add an Area hazard
Click the feature type in the menu to highlight it
Draw the area on the map by clicking on the start location and then around the corners of the shape completing the shape by drawing the last point in the same place as they first point
Use Reset sketch if you need to redraw the area
Select Add details
Enter the hazard details
Click Save hazard or Back to cancel
If you cannot see the Add hazard button, you do not have permissions to add hazards and should talk to your administrator.
Hazards added to individual properties will be exported as part of the property group Hazard Summary. For kiwifruit properties, a bulk export is available for import into Zespri’s Maturity Clearance System.