Blocks
Blocks provide information of what crops are growing on the orchard, their size, structure, growing method, variety and other important information. As changes are made on the ground, maps need to be updated with this new block information. Blocks can only be managed from within an individual property. Learn how to navigate to a property here.
Navigation
When you first navigate to a property, the boundary of the orchard is visible in its spatial location.
From here, you can click in to view individual block attributes.
Use the Next Feature button to effortlessly move between blocks.

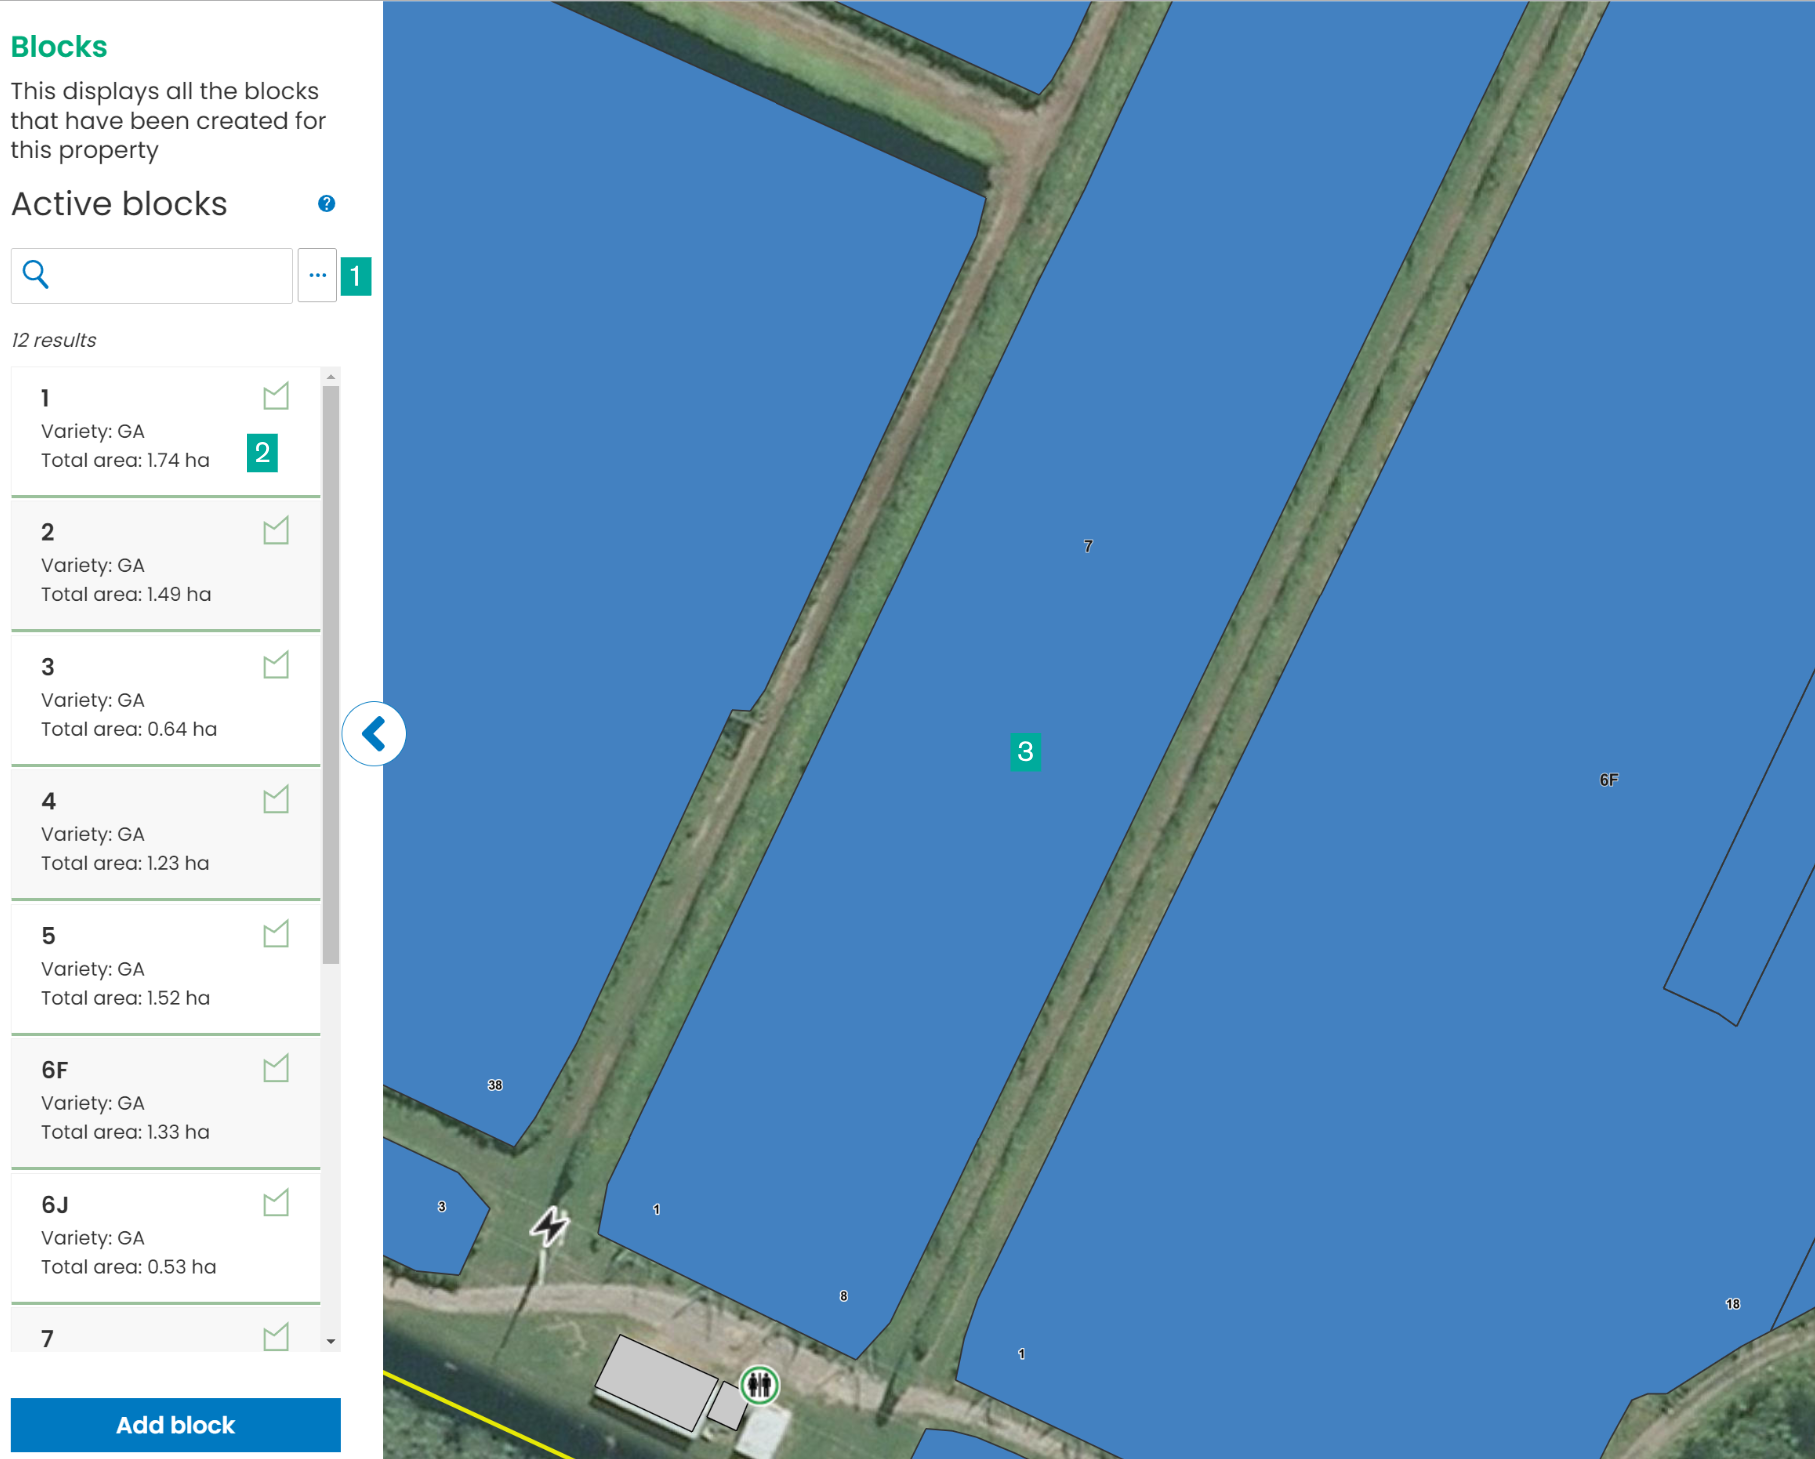
Blocks workflow
Search bar: Here you can search for a block.
Block list: This this the list of blocks on the map. You can click on a block to view more information.
Block: This is a block, click on it to view more info.
Block Attributes
These are the fields on a block that contain important information about the crop used by contractors visiting the property to carry out various tasks.
Examples of attributes include:
Crop Type
Variety
Total Area
Planted Date
Production Status
1st Year Producing
Grow Method
Cover Status
Graft Date
Structure
Rootstock
Attributes can be shown/hidden and set to mandatory/optional depending on your specific requirements. Contact us if you would like to request changes to your setup.
Add a block
When a new crop is planted, the property map needs to be updated.
Select the Blocks workflow from the sidebar
Select Add Block (button at bottom of blocks list)
Draw a box around the block you want to draw and click on the original point to end drawing. The new area of the block will be displayed.
To adjust the drawn area, click on the area that was drawn. You can move the vertices (points) to adjust the block. The new area will be displayed with each adjustment.
Select Add details
Enter the block details
Click Save block to adopt the changes or Back to cancel
If you cannot see the Add Block button, you do not have permissions to add a block and should talk to your administrator.
Edit a block
When blocks change, the Orchard map needs to be updated. Some examples of changes include:
new block structure
new variety
new production status
new graft
Select the Blocks workflow from the sidebar
Select the block to edit
Select the ellipsis (three dots at top right of side bar when in an individual block)
Select Edit
Make changes as required
Click Save to adopt the changes or Cancel to go back
If you cannot see the edit button, you do not have permissions to edit and should talk to your administrator.
Merge blocks
Blocks that are made up of crops with the same attributes are sometimes combined for easier management. when this happens, the Orchard map needs to be updated.
Select the Blocks workflow from the sidebar
Select the block you want to become larger/retain. The attributes (name, variety, structure, producing status, graft year etc.) from the block that you select will be applied to the merged block.
Select the ellipsis (three dots at top right of side bar when in an individual block)
Select Merge block
Select the block to merge into the selected block. Selected blocks are coloured blue. Once selected, the blocks will turn green and the merged area will be displayed.
Once all blocks to be merged are selected, click Confirm merge to adopt the changes, Reset selection to change the blocks or Cancel merge to go back
If you cannot see the Merge block option, you do not have permissions to merge and should talk to your administrator.
Split a block
When changes are made to part of a block only, the Landkind block needs to be split to reflect these changes. Blocks can only be split from within an individual property, learn how to navigate to a property here.
Select the Blocks workflow from the sidebar
Select the block you want to split
Select the ellipsis (three dots at top right of side bar when in an individual block)
Select Split block
Draw a box around the area to split and click on the original point to end drawing. The new areas and new boundary lengths will be displayed atop each new (draft) block.
To adjust the drawn area, click on the area that was split. You can move the vertices (points) to adjust the split. The new areas will be displayed with each adjustment.
To reset the drawn area click Reset split
Once you are happy with the displayed split, click Confirm split to adopt the changes or you can select Cancel split to go back to the blocks summary
Check/update the block information for the new blocks
If you cannot see the Split crop option, you do not have permissions to split and should talk to your administrator.
