
Property Editor
Create, update, and maintain your map boundaries and RPIN information using the Property Editor.
Opening the Property Editor
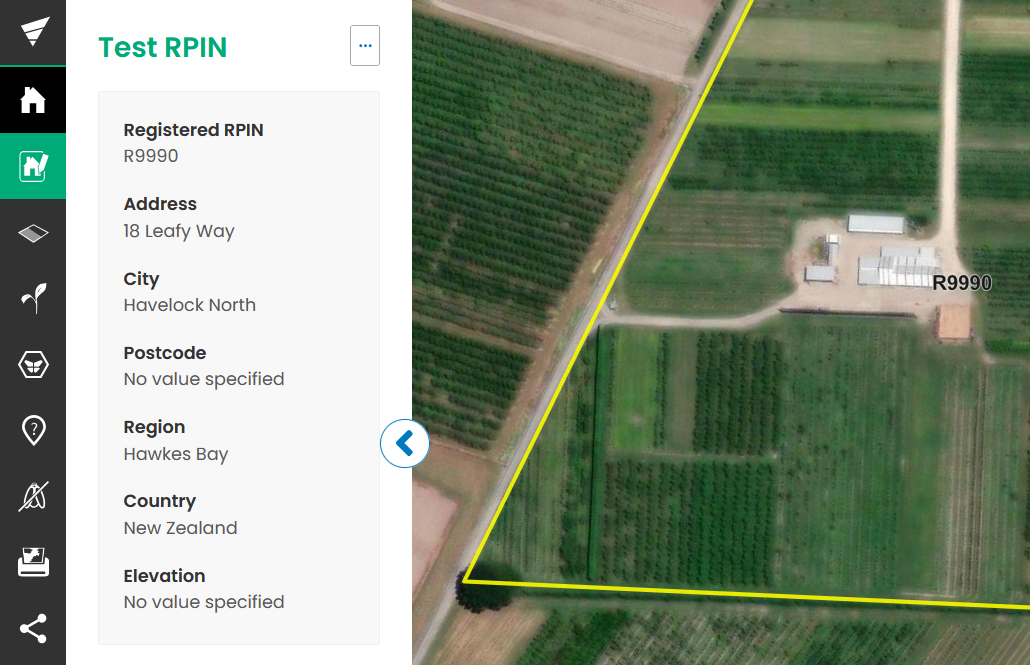
To open the Property Editor, click the Property Editor workflow on the sidebar. When you navigate to the Property Editor workflow, the property boundary will be shown on the map along with the information held about the property.
Property Attributes
These fields provide important information about the property
and are used when PDF (Desktop) or Share Map Links are created.
Examples of attributes include:
Address
Postcode
Region
Elevation
Edit Property Info
When details of a property change, these need to be updated in Landkind. The information in this workflow is what will be populated on any PDF or Share map links created. Property details can only be edited from within an individual property. The RPIN and Orchard Name cannot be changed within Landkind.
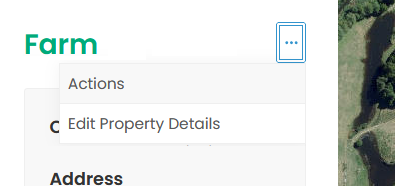
Select the Property Editor workflow from the sidebar
Select the ellipsis (three dots at top right of side bar)
Select Edit Property Details
Make changes as required
Click Save to adopt the changes or Cancel to go back
If you cannot see the edit button, you do not have permissions to edit and should talk to your administrator.
Edit Property Boundary Area
When a property or its features are not printing within the print area, you can update the property boundary to adjust the way the property prints.
Select the Property Editor workflow from the sidebar
Select the ellipsis (three dots at top right of side bar)

Ellipsis
Select Edit Property Details
Click on the vertices (points) of the yellow property boundary to change its area
The orange circles are existing vertices.
The white circles are the mid point between two existing vertices.
Right-click an existing vertex to delete it
If you click on the white vertices you will create a new vertex that you can adjust while leaving the pre-existing vertices the same.
Click Save to adopt the changes, Reset geometry changes to recommence drawing or Cancel to go back