
Property Features
The Property Features workflow identifies the location of specific facilities, structures or locations on the property. This includes recommended features such as entry points, loading bays, water sources, first aid kits, assembly points and bathrooms.
Navigation
When you navigate to the property features workflow, a detailed spatial view of the features on the property will display including a list of the features in the sidebar.
From here you can click in to view individual feature attributes.
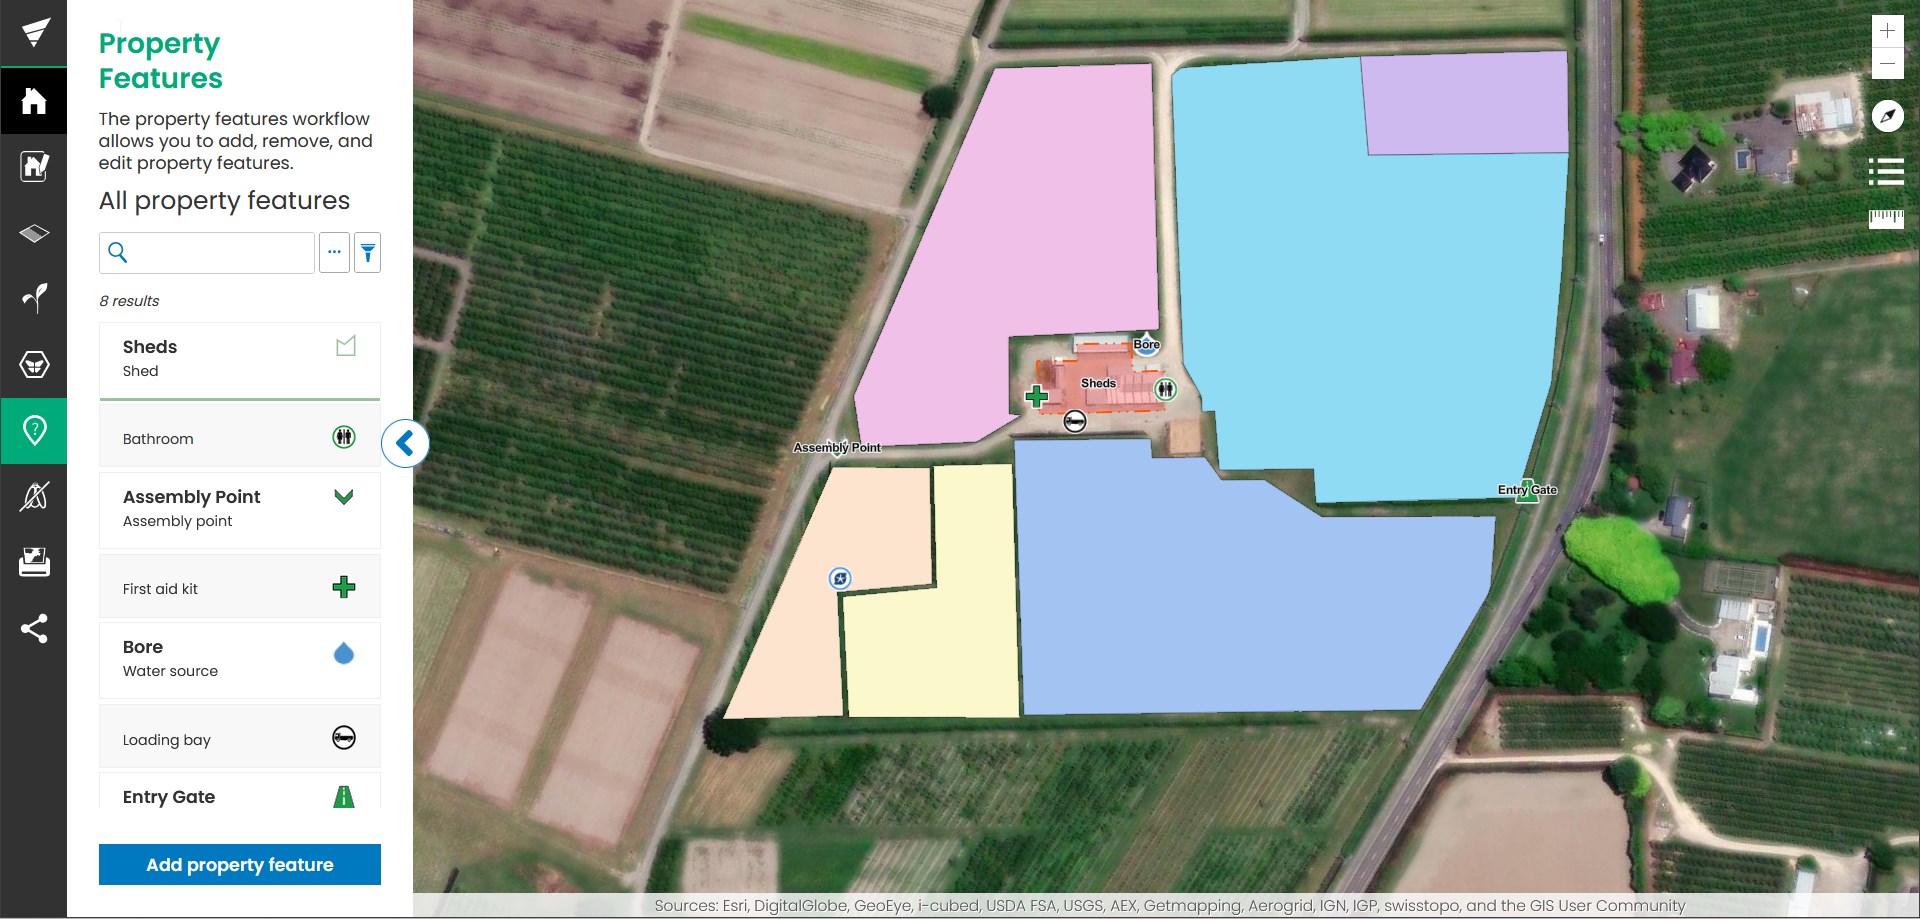
The property features page contains the following aspects:
Search bar and Filter: Here you can search for a feature or add a filter to remove points, lines or areas.
Feature list: This this the list of features on the map. It is displaying 50 of the 84 features. You can click on a feature to view more information on it.
Pagination limit: Change this drop-down to view fewer or more features on the map.
Add feature: Click this button to add more features to the map.
Types of Property Features
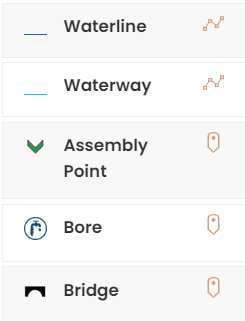
There are three types of drawing methods that can be used to identify features on the property depending on their nature and location
Point is used when there’s just a single location for the feature such as water supply or toilet
Line is used for features such as waterlines, shelter belts or powerlines
Area is used for features such as a silage pit, effluent pond or a building
Property Feature Attributes
These are the fields on a feature that contain important information used to identify the feature.
Examples of attributes include:
Feature name (label for map)
Feature description
Feature type (determines the icon displayed for the feature)
Show label on map (“Yes” will display feature name with icon, “No” will hide the feature name to only display the icon)
Add Property Feature
After clicking ‘Add property feature’ you will be presented with a list of available feature types. These are split into three different geometry types.
You should select the correct type and geometry for the feature.
Use point when there’s just a single location for the feature such as water supply or toilet

Use line for features such as waterlines, shelter belts or powerlines

Use area for features such as a silage pit, effluent pond or a building

You can filter the list of available feature types by typing in the search box or by clicking the filter button
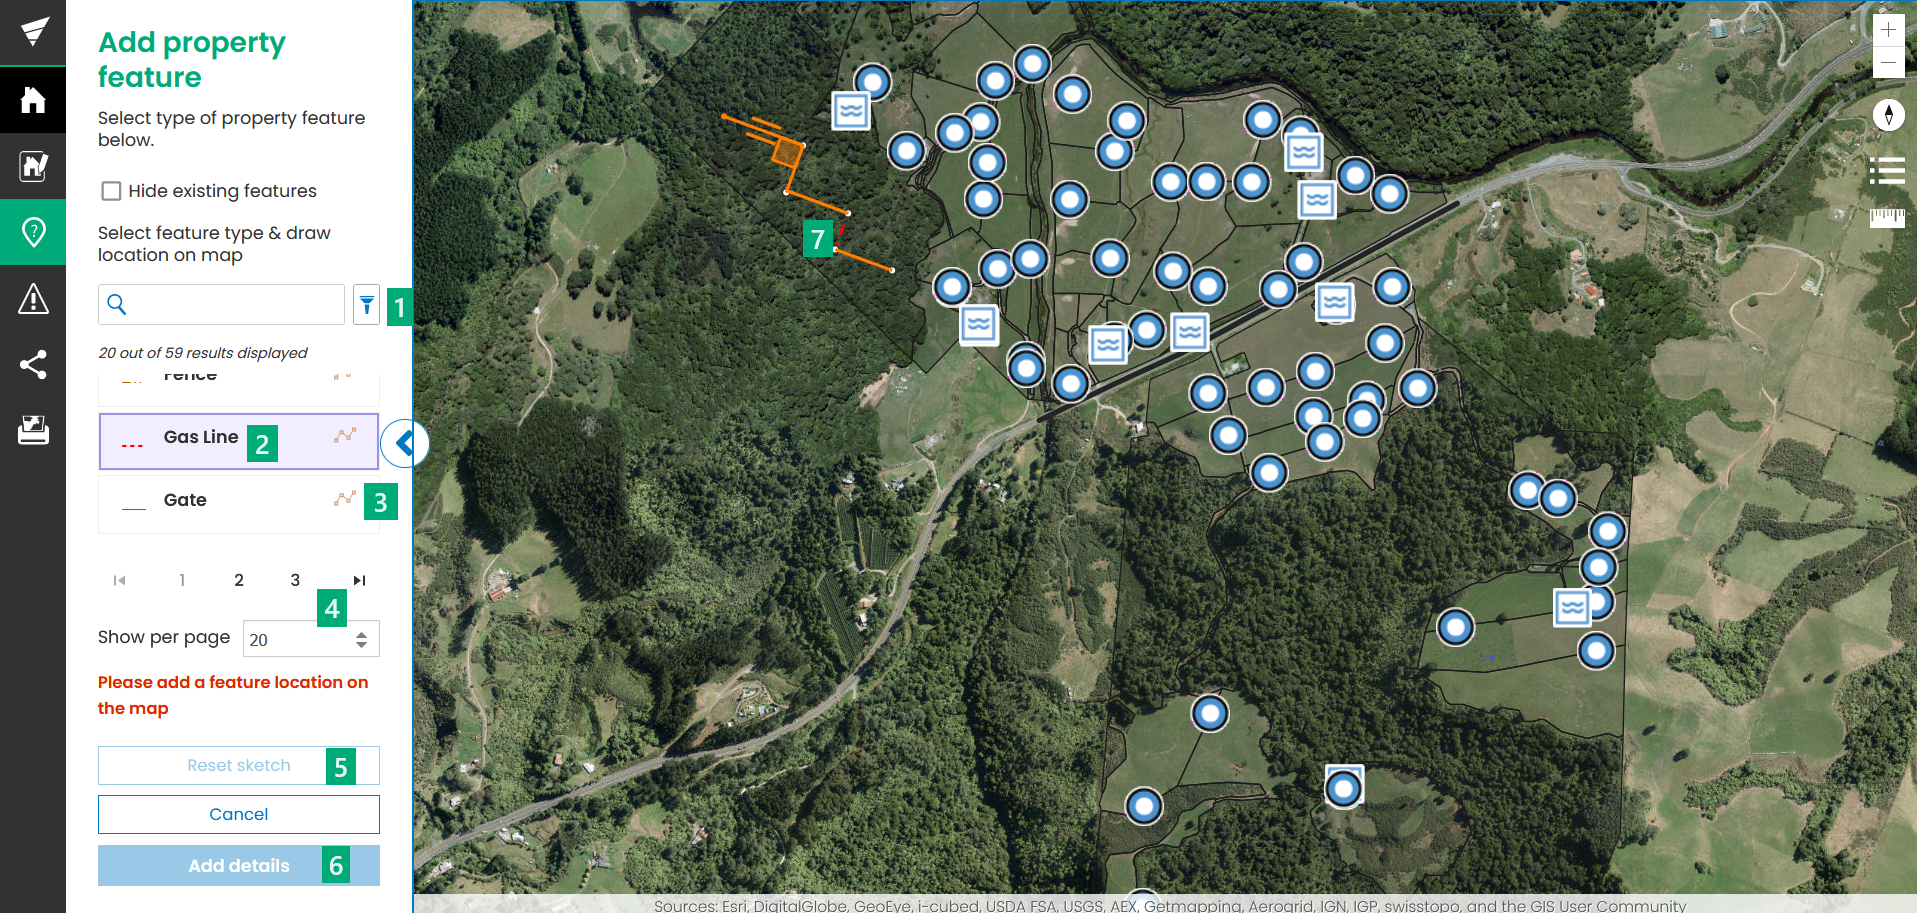
Search and Filter functions: Search to find a specific type of feature to add. Filter to select a specific type of geometry (point, line or area)
Selected feature: The Gas Line feature type has been selected
Geometry: This is showing that it is a line feature type
Pagination: Here you can increase or decrease the number of feature types in the list
Reset Sketch: This becomes available when you have finished drawing. Double click to finish drawing
Add details: This becomes available when you have finished drawing. Double click to finish drawing
Created feature: Draw on the map to create the selected feature type. Orange guide lines can also be seen, these help to create shapes and straight edges.
Add a Point feature
Click the feature type in the menu to highlight it
Click on the map to add the feature at that location
Use Reset sketch if you need to change the location
Select Add details
Enter the feature details
Click Save feature or Back to cancel
Add a Line feature
Click the feature type in the menu to highlight it
Draw the line on the map by clicking on the start location and then double clicking to end the line
Use Reset sketch if you need to redraw the line
Select Add details
Enter the feature details
Click Save feature or Back to cancel
Add an Area feature
Click the feature type in the menu to highlight it
Draw the area on the map by clicking on the start location and then around the corners of the shape completing the shape by drawing the last point in the same place as they first point
Use Reset sketch if you need to redraw the area
Select Add details
Enter the feature details
Click Save feature or Back to cancel
Want to change the available features? Contact us and we can help out!
Edit a Property feature
Select the Property Feature to edit
Select the ellipsis (three dots at top right of side bar when in an individual block)
Select Edit
Make changes as required
Update information
Change location of the feature by moving the vertices (dots) on the map
The orange circles are existing vertices.
The white circles are the mid point between two existing vertices.
If you click on the white vertices you will create a new vertex that you can adjust while leaving the pre-existing vertices the same.
To move the whole feature hover in the middle of it, Left Click and Hold to drag the feature to a new location.
Click Reset geometry changes to move vertices back to original locations
Click Save or Cancel to go back
Add label